THIS PROCEDURE MUST BE PERFORMED BY A QUALIFIED TECHNICIAN.
 WARNING
HAZARDOUS VOLTAGE: Risk of electric shock. Can cause injury or death. Disconnect all remote electric power supplies before servicing.
THIS PROCEDURE MUST BE PERFORMED BY A QUALIFIED TECHNICIAN.
WARNINGHAZARDOUS VOLTAGE: Risk of electric shock. Can cause injury or death. Disconnect all remote electric power supplies before servicing.
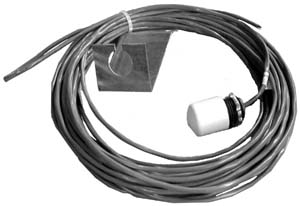
The outdoor temperature sensor provides outdoor temperature information to Steffes microprocessor-based heating systems for automatic charge control.
The outdoor temperature sensor must be placed in a location where it can accurately sense the outdoor temperature and will not be affected by direct sunlight or other sources of heat and cold. Mount the sensor using the enclosed bracket. If installing with an outdoor control, the sensor can be installed using one of the 1/2" knockouts on the enclosure.
Route the low voltage wire from the sensor to the low voltage raceway of the heating system or control.
If installing line voltage rated low voltage wire through a line voltage compartment, the shield must be grounded.
NOTE: NEVER install wiring in the line voltage electrical compartment unless it is rated for line voltage.
Always segregate low voltage wiring from line voltage wiring.
Avoid splitting low voltage wire conductors before their connection point.
Seal external wall openings.
If needed, up to 250 feet of Class II (thermostat) wire can be used as extension wire provided it does not enter the line voltage electrical compartment.
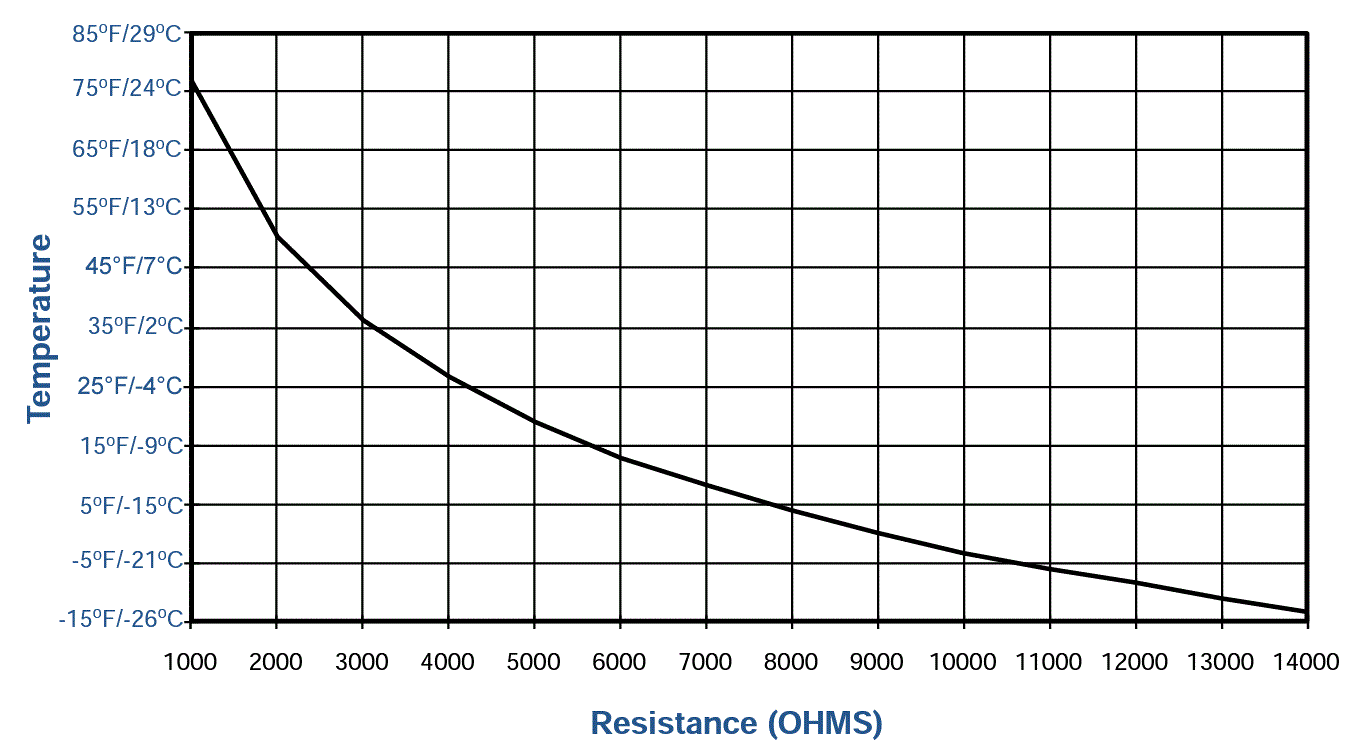
With an ohm meter, check resistance across the outdoor sensor wires. Use the Temperature Sensor Resistance Graph to verify that the ohm value of the sensor is appropriate for the current outdoor temperature.

Use the links below to see the connection locations for each type of system using the outdoor sensor.
1200119 Rev 12 6/14/2022