THIS PROCEDURE MUST BE PERFORMED BY A QUALIFIED TECHNICIAN.
If you have not done so already, please review the generic installation steps here.
THIS PROCEDURE MUST BE PERFORMED BY A QUALIFIED TECHNICIAN.
If you have not done so already, please review the generic installation steps here.
NOTE: If installing a Transceiver indoors, only one outdoor temperature sensor is required for automatic charge control. If installing a Transceiver outdoors, an outdoor temperature sensor may be utilized but is not required as the Transceiver comes equipped with a built-in thermistor for sensing outdoor temperature.
Disconnect power and route low voltage wire from the outdoor sensor through the control's low voltage raceway to the low voltage terminal strip.
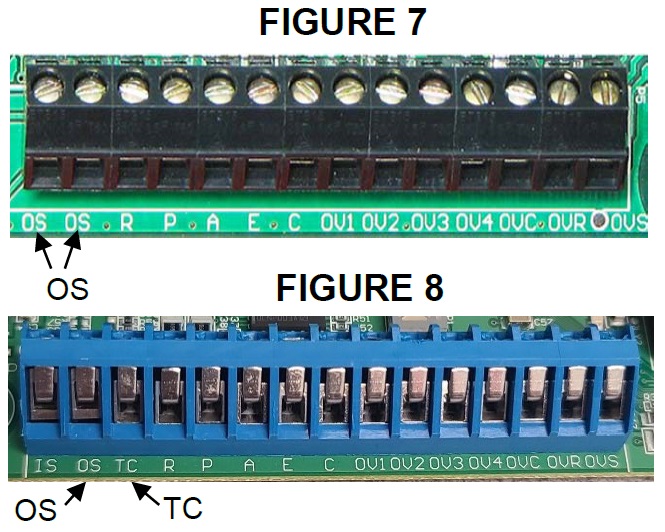
Connect the outdoor temperature sensor wires to the two "OS" terminals (Figure 7) or the OS and TC terminals (Figure 8).
NOTE: If connecting an outdoor sensor, the built-in temperature sensing thermistor MUST be removed.
The TC (thermistor common) terminal is shared by the outdoor and indoor sensors.
Conduct a pull test to determine connections are secure.
Restore power and verify proper outdoor temperature information is received by the Steffes heating system (L46 on 2000-Series, HELP Menu on 2100/3100/4100/5100 and Quantum units)

NOTE: Refer to Owner’s and Installer’s Manual for additional information.
1200119 Rev 12 06/14/2022