THIS PROCEDURE MUST BE PERFORMED BY A QUALIFIED TECHNICIAN.
OPERATION
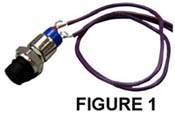
The Push Button Override Module (Figure 1) can be installed with a Steffes Transceiver or Mini Receiver, which are used to control devices such as water heaters. The push button override module is an optional feature that allows the user to override the peak control signal and operate the controlled device during a peak time (power company permitting). If activated, the duration of one override cycle is 90 minutes.
To initiate the override, press the override button on the front cover of the transceiver/mini receiver once.
-
A new 90-minute cycle begins each time the button is pushed.
-
To initiate an override cycle, a “peak” mode must be present.
-
The override stops automatically after 90 minutes or at the start of next off-peak period, whichever comes first.
-
Cancel the override by de-energizing the transceiver/mini receiver.
 WARNING
HAZARDOUS VOLTAGE: Risk of electric shock. Can cause injury or death. System may be connected to more than one branch circuit. Disconnect power to all circuits before servicing.
Transceiver Installation
De-energize Control
De-energize the transceiver and remove the front cover.
Drill hole
Drill a ¼” hole for the override button on the front cover. See diagrams in Figure 2 for specific application.
Six Pole Mini Receiver Installation: Locate the center hole in the top row of the bottom cluster of pre-drilled ventilation holes on the front cover. (Refer to Figure 3 for reference to the correct position in the front cover.)
Remove Nut
Remove the nut from the push button override.
Insert Button
Insert the push button of the override through the drilled hole from the backside of the front cover.
Secure Button
Secure the push button in place with the nut.
Connect OVR and OVS
Connect the two purple wires to OVR and OVS on the transceiver board (Figure 3).
Set Dipswitch 8
If the transceiver is being installed as a receiver, set DIP switch #8 to the appropriate position with relation to the override configuration desired: OFF: Circuit connected to relay 1 is enabled during a peak control time when an override cycle is initiated. ON: All circuits are enabled during a peak control time when an override cycle is initiated.
Check Out
Proceed to Check-Out Procedure.