THIS PROCEDURE MUST BE PERFORMED BY A QUALIFIED TECHNICIAN.
 WARNING
Hazardous Voltage. Can cause injury or death.
-
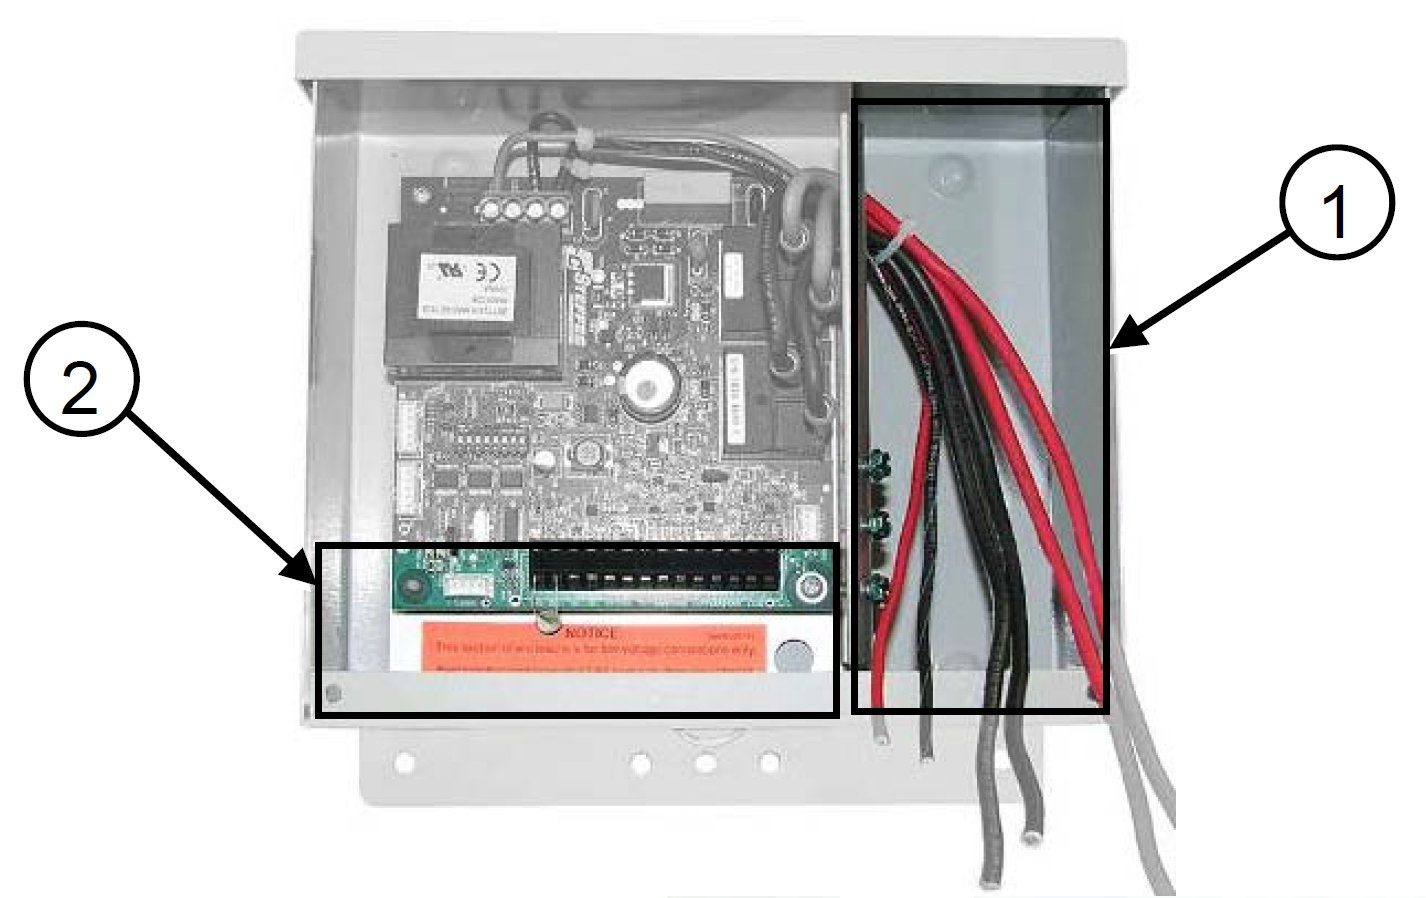
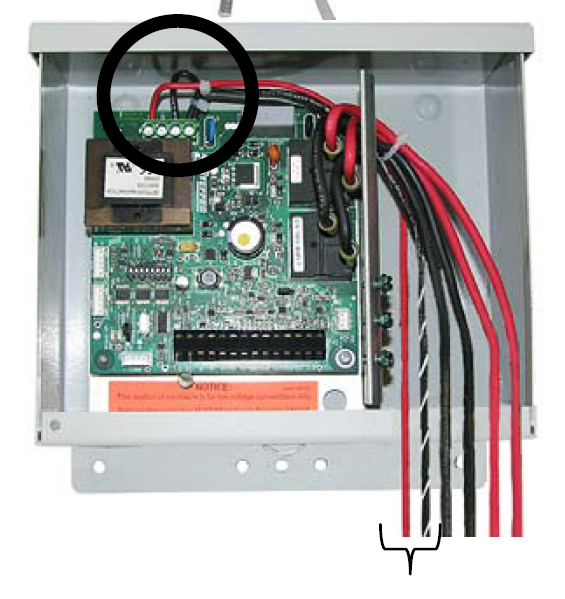
Route line-voltage conductors (circuit board power and controlled-load circuits) and make line-voltage connections only in the line-voltage connection area, (1).
-
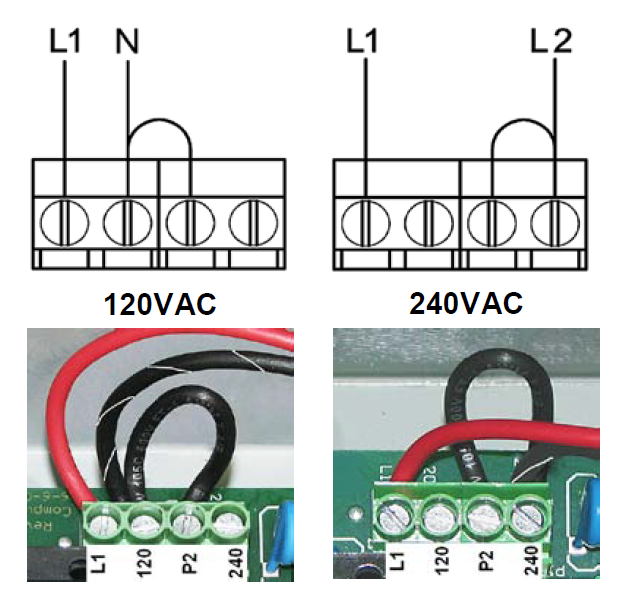
Use only copper conductors that are rated for 75° C minimum.
-
Route low-voltage conductors (remote outdoor sensor, power company signal/control switch, override switch, etc.) only into the low-voltage connection area, (2).
-
Install in accordance with applicable local, state, and national codes and regulations.