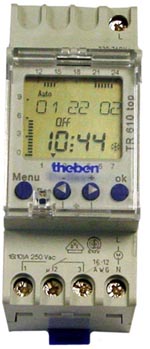
SETTING THE TIME CLOCK
Throughout the programming of the time clock, if there is approximately 90 seconds of inactivity (no buttons are pushed), the display will automatically reset to normal operation. If the clock resets and the program information you are entering or editing is not stored, the time clock will default to the previous settings. The new information will have to be reprogrammed.
NOTE: The Theben time clock is equipped with a lithium battery with an approximate 4-year power reserve.
Activate the Time Clock
The time clock is delivered in a "sleep" mode. To activate without a service voltage, press and release one of the four buttons.
NOTE:To navigate through the menus below, press the "◄" or "►" button. Press the “OK” button to save each selection and move to the next one.
Select Language
Select the national language.
Set the Year
Set the current year.
Set the Month
Set the current month.
Set the Day
Set the current day of the month. This display will show the month followed by the day (i.e. 09.01 is September 1st).
Set the Hour
Set the current hour. Ensure the correct am/pm hour is selected.
Set the Minute
Set the current minutes .
NOTE: The time clock should continue with setup of daylight savings time; however, it may return to the normal operating mode and skip the daylight savings section. If this occurs, press the "MENU" button until the " " is flashing at the top of the display. Press "OK" and repeat Steps 3-8.
Set Daylight Savings
To set whether or not daylight savings time (DST) will be utilized, press the "►" button until "SUM/WIN" is displayed. Press "OK".
Main Display
The clock will return to the time/status display and the day of the week should automatically be indicated by an arrow (1 = Monday...7 = Sunday) at the bottom.
NOTE: If daylight savings time is to be recognized, a snowflake or a sun will appear in the clock display. A snowflake indicates winter months (days between last Saturday in October and first Sunday in April). A sun indicates summer months (days between first Saturday in April and last Sunday in October).
SETTING THE CHARGE (ON) AND CONTROL (OFF) CYCLES
NOTE: Start times for each charge (on) and control (off) cycle MUST be set. To ensure proper operation, the first program setting should be charge (on). If the first cycle would normally be control (off), set a 12:00 a.m. charge (on) time as part of your schedule.
Press Menu Button
Press the "MENU" button until "Prog" is flashing in the upper portion of the display. Press "OK".
Select "New Prog"
Use the "◄" or "►" button until "NEW PROG" is flashing in the display. Press "OK". "FREE" and a number will automatically appear after a few seconds to indicate how many program locations are available. There are a total of 28 program locations available if no program settings have been entered.
Set "Time On"
The clock will automatically display "TIME ON" or "TIME OFF" toward the top of the display. Below this, "On" or "Off" will be flashing. Use the "◄" or "►" button until "Time ON" displays and press "OK" to set the charging period.
NOTE: “ON” is a charging cycle and “OFF” is a control cycle.
Adjust the Hour
"HOUR" will be displayed across the top. Use the "◄" or "►" button to adjust the hour. Press "OK".
Adjust the Minute
"MINUTE" will be displayed across the top. Use the "◄" or "►" button to adjust the minutes. Press "OK".
Select the Day of the Week
"MONDAY" will display. Select the days of the week that this particular program setting pertains to by using the "◄" or "►" button until the first day of the cycle is flashing. Press "OK" and "COPY" will flash. Press "OK" and "ADD TU" will appear. Continue to press "OK" to select the desired days. To bypass a day, press "►". After "ADD SU" is displayed and/or selected, "STORE" flashes on the display. Press "OK". "NEW PROG" will flash across the display.
NOTE: Bypassing a day keeps the time clock in the last state it was in prior to the bypassed day.
Set "Time Off"
Press "OK" and "►" to set "TIME OFF" (control cycle). Repeat Steps 3-6 to program "TIME OFF" (control cycle).
Enter Any Other Programs
Press "OK" to enter another program cycle or press "MENU" to return to the standard display.
 WARNING