THIS PROCEDURE MUST BE PERFORMED BY A QUALIFIED TECHNICIAN.
 WARNING
HAZARDOUS VOLTAGE: Risk of electric shock. Can cause injury or death. Heater may be connected to more than one branch circuit. Disconnect power to all circuits before servicing.
NOTE: Auto reset and manual reset core charging high limit switches are not interchangeable. The limit switch used as a replacement MUST be the same style and type as the limit switch the heater was manufactured with. Heaters with serial number ending in 095580 or lower use auto reset limit switches. Heaters with serial number ending in 095581 or higher use manual reset limit switches.
Deenergize and Open Heater
Disconnect power to all branch circuits of the heater and remove the painted front panel.
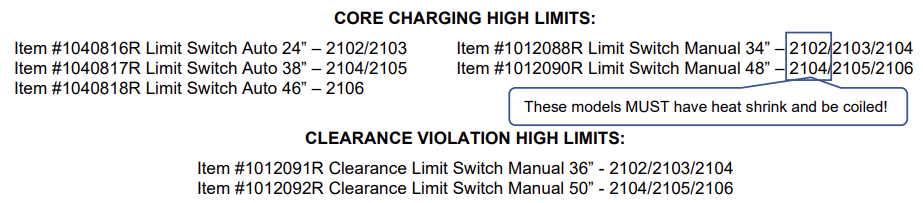
Hinge the Right Side Panel
Hinge the right side panel open by A) removing the screw located above the grill slats on the lower right side of the heater; B) loosening the screw located at the top right corner of the electrical compartment; and C) pushing out on the right side panel. Refer to Figure 1.
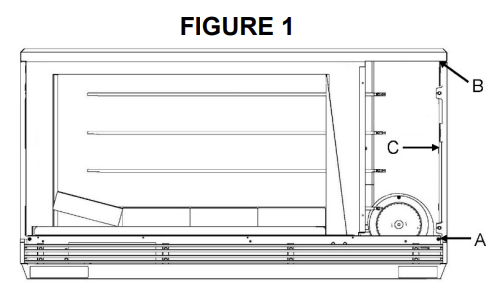
Figure 1
Disconnect Wires
Disconnect the wires connected to the high limit switch being replaced.
Remove Screw
Remove the screw(s) holding the high limit switch to the bracket and remove the high limit switch by pulling it out of the guide tube.
Uncoil Limit
Uncoil the new high limit switch.
2102 and 2104 Heaters Only:
Slide the heat shrink tubing onto the limit switch (Figure 2).
NOTE: If installing 1012088R limit in a 2102 or 1012090R limit in a 2104, heat shrink is required and the limit MUST be coiled as shown in Figure 2.
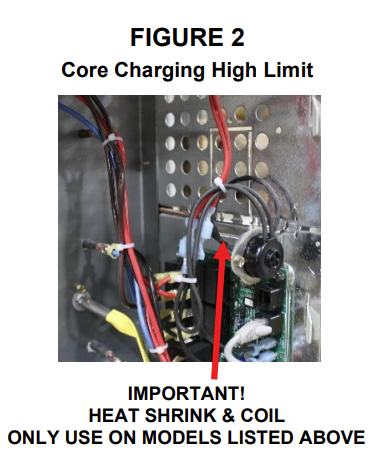
Figure 2 - Core Charging Limit
 IMPORTANT
HEAT SHRINK & COIL - ONLY USE ON MODELS LISTED ABOVE.
Install New Limit
Insert the new high limit switch by gradually inching it through the bracket and into the guide tube. See Figure 4.
NOTE: DO NOT use water-based lubricant to aid in the installation of the core charging high limit switch(es). Use of a water-based lubricant will make any future replacement of these limits impossible.
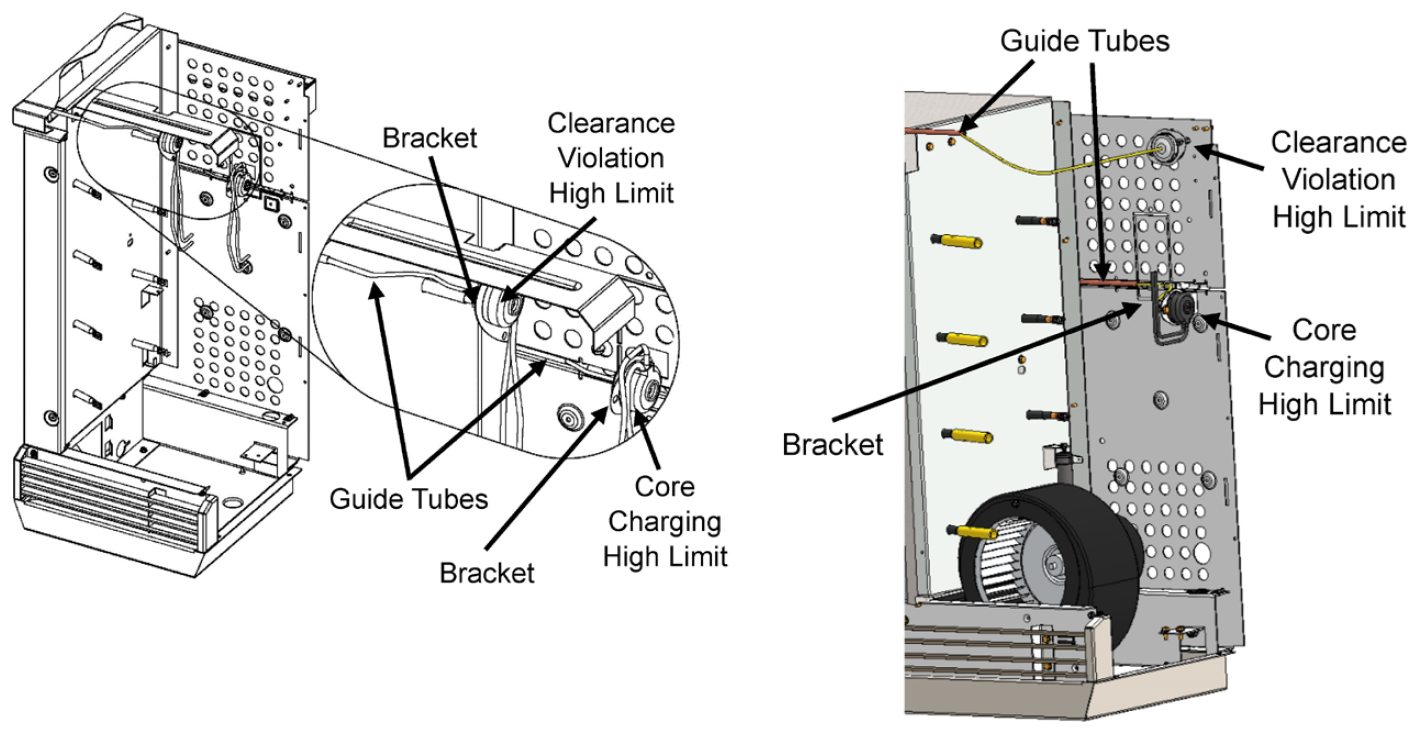
Figure 4
Coil Excess
2102 and 2104 Heaters Only: Coil any excess length of the limit switch wires and tie wrap together as shown in Figures 2 and 3.
NOTE: If installing 1012088R limit in a 2102 or 1012090R limit in a 2104, heat shrink is required and the limit must be coiled as shown.
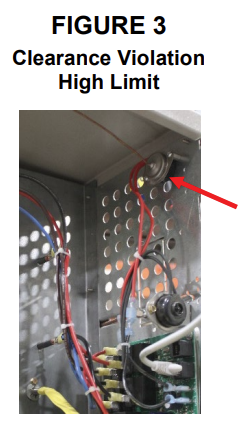
Figure 3 - Clearance Violation Limit
Secure Limit
Connect the limit switch to the bracket.
Connect Wires
Connect the wires from the high limit switch as shown in the wiring diagram below.
NOTE: The core charging and clearance violation high limit switches MUST be series connected to the Limit 1 & Limit 2 terminals on the Base I/O Relay Board.
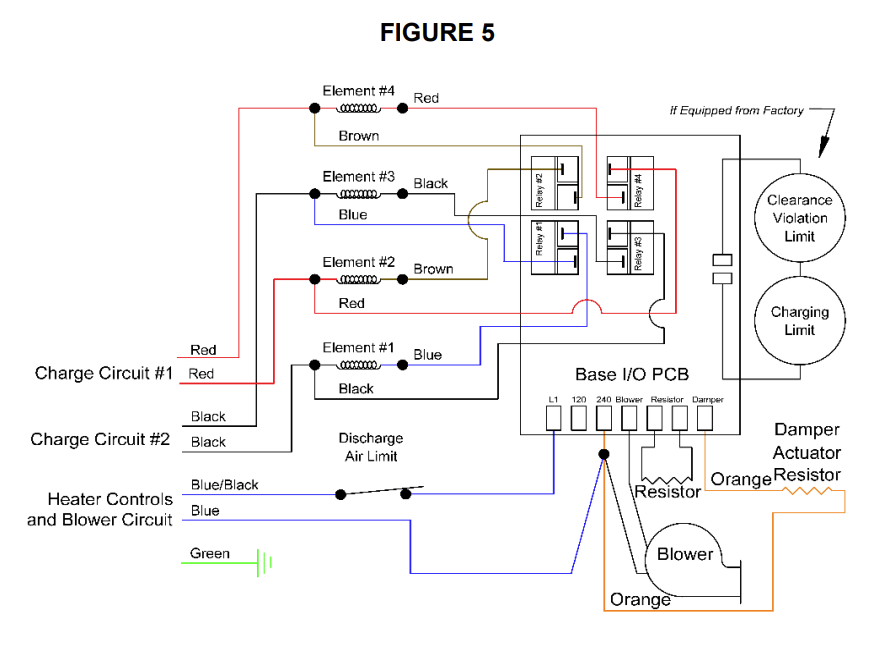
Figure 5
Close Heater
Secure the right side panel, reinstall the painted front panel, and restore power to the heater.